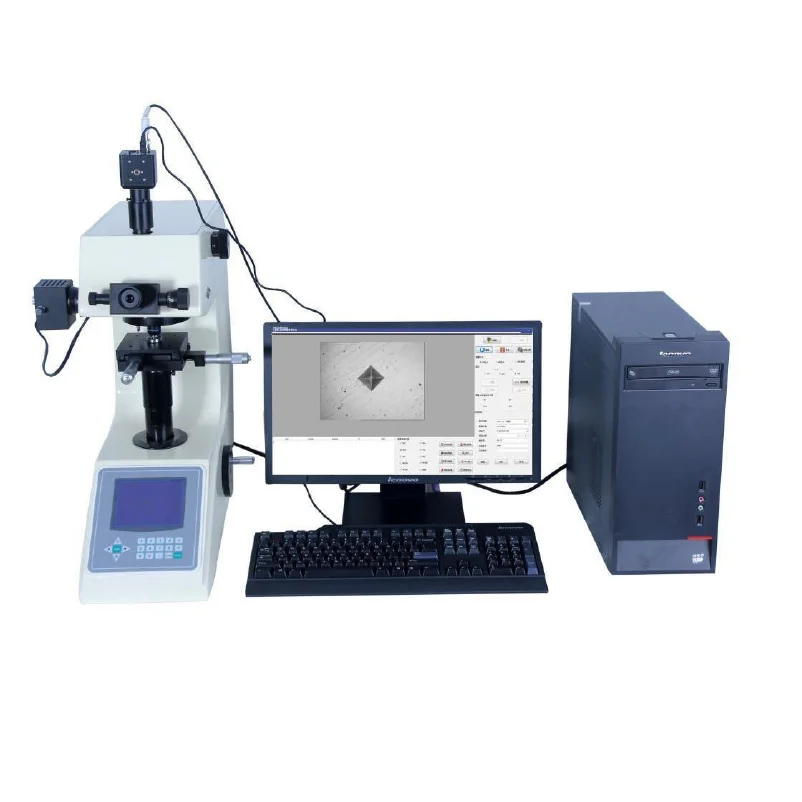
CCD Vickers Image Processing System Manufacture in India

CCD Vickers Image Processing System
The CCD Vickers image processing system is a combination of a computer microcomputer automatic measurement system and a hardness tester. The digital display Brinell, microscopy, and Vickers hardness tester is connected to the computer through the CCD camera interface. The entire test process is simply operated by the keyboard and mouse. It can be completed, the operation is convenient, the measurement accuracy is high, the human error is better reduced and the operator's visual fatigue is avoided, and it can meet various hardness measurement requirements.
Introduction
- ➞ The fuselage is made of high-quality cast iron by one-time casting, with the car paint treatment process, and the appearance is round and beautiful
- ➞ The worm and worm lifting system can better improve the test stability and test accuracy, and there is no need to focus again after the test is completed
- ➞ Equipped with automatic turret function, high-definition measurement and observation-dual objective lens combination, combined with the high-definition micrometer eyepiece with built-in length encoder, realizes the one-key measurement of the indentation diagonal, which better reduces the interference of human operation and Reading error
- ➞ Convenient numerical control system, which can automatically perform unit conversion of the full hardness scale
- ➞ The maximum and minimum hardness values can be set. When the test value exceeds the set range, a buzzer will sound
- ➞ With software hardness value correction function, the hardness value can be directly corrected within a certain range
- ➞ With database function, the test data can be automatically saved in groups, each group can save 10 data, and more than 2000 data can be saved
- ➞ It has the function of displaying the hardness value curve, which can directly display the change of the hardness value
- ➞ CCD image processing system is optional, and the Knoop indenter is optional for Knoop hardness measurement
- ➞ Configure a wireless Bluetooth printer, and output data through RS232, USB (optional) interfaces
- ➞ Accuracy complies with GB/T4340.2-2018 ISO6507-2 and American ASTM E384
Scope of Supply
- ➞ Ferrous metals, non-ferrous metals, IC flakes, surface coatings, laminated metals
- ➞ Glass, ceramics, agate, gems, thin plastics, etc.
- ➞ Hardness test of the depth and gradient of the carbide layer and quenched layer.
- ➞ It is suitable for precision micro Vickers hardness measurement of parallel planes, tiny parts, and ultra-thin parts.
